Difference between revisions of "Paint Tools"
m (→The Brush + Pattern/Texture + Mixing strokes(Smudge)) |
m (→Paint tools and Clipboard feature) |
||
| (29 intermediate revisions by the same user not shown) | |||
| Line 1: | Line 1: | ||
| − | === | + | ===Paint tool + Texture (raster)=== |
| − | + | ====Patterns/Textures on the GIMP==== | |
| − | + | Which the differences and likeness between pattern and a brush (.gbr and .gih) on GIMP? | |
| − | |||
| − | + | # Both are the resources to mark or make stains | |
| − | + | # Both are based in raster images | |
| − | # | + | # Pattern is used to emulate textures in different kind of techniques or |
| − | # | + | # To fill figures with textures |
| − | # | + | # Brush is used to emulate random textures, of natural properties or not of brushes in the real world. |
| − | # | ||
| − | |||
| − | + | Well, we can to think the patterns as brush very specific. | |
| − | |||
| − | |||
| − | |||
| − | |||
| − | |||
| − | ==== | + | ====Proposal of the feature on GIMP==== |
| − | + | [[Image:paint-tool+texture-option.png]] | |
| − | [[Image: | ||
| − | The | + | The tool more near of an ideal Brush with Texture features (similar to Krita or Photoshop) is the Clone Tool. |
| − | + | Perhaps this Tool is a good way to build a new Tool. | |
| − | |||
| − | |||
| − | + | The Brush + Pattern is basically a dual brush where the pattern is a kind of mask in background. | |
| − | + | Options need are: | |
| − | + | # Colour: Is necessary to use the colour asset on... as a normal brush. | |
| − | + | # Texture aspect: Is necessary to have a flag to choose between default and inverted. | |
| − | + | # Source: Image and Pattern (texture). Image as source is interesting to control something very similar to impasto or smudge. | |
| − | + | # Alignment: Registered and Fixed. | |
| − | |||
| − | |||
| − | |||
| − | |||
| − | |||
| − | |||
| − | |||
| − | |||
| − | |||
| − | ==References== | + | ====References==== |
| − | + | =====How works on Krita===== | |
| − | |||
| − | ===Krita | ||
*[https://docs.krita.org/Texture:Link Feature on Krita] | *[https://docs.krita.org/Texture:Link Feature on Krita] | ||
*[http://www.davidrevoy.com/article107/textured-brush-in-floss-digital-painting David Revoy explain the feature on Krita] | *[http://www.davidrevoy.com/article107/textured-brush-in-floss-digital-painting David Revoy explain the feature on Krita] | ||
| − | ===Photoshop | + | =====Photoshop===== |
[[Image:Brush_Texture_Option_Photoshop.png]] | [[Image:Brush_Texture_Option_Photoshop.png]] | ||
| Line 67: | Line 45: | ||
**** Enable Transfer > [https://www.youtube.com/watch?v=4GMeDsI1088&t=19m30s] | **** Enable Transfer > [https://www.youtube.com/watch?v=4GMeDsI1088&t=19m30s] | ||
***** Opacity Jitter or Flow Jitter | ***** Opacity Jitter or Flow Jitter | ||
| + | |||
| + | ===Paintbrush and Pencil with smudge ability (raster)=== | ||
| + | Basically, this feature is to have the current Smudge tool + a Paint tool (2) together, in an unique tool. Now, the Smudge tool has only the capability to blend the stains, using a brush. The stains that are previously created. | ||
| + | |||
| + | On GIMP, now, is possible to make this in two steps - first we paint something (Pencil, Paintbrush, Airbrush, etc.) and after, with Smudge tool, we make the blend the stains/strokes. | ||
| + | |||
| + | With MyPaint brushes, is possible to have the smudge on their brushes, but the mark is a basically a circle (dab). In the ideal painting world, is interesting to have the raster brushes with dynamic stains. The .gbr and .gih brushes with paint dynamics)... have the result more richest that a smudge brush on MyPaint. | ||
| + | Figure smudge brush with MyPaint | ||
| + | Figure smudge brush with GIMP (via 2 steps: make stains with some paint tool and after with smudge tool blend them). | ||
| + | |||
| + | '''Notes'''<br> | ||
| + | 2. Is necessary to link the smudge with all paint tools... or in only specific tool, for instance, the paintbrush? | ||
| + | |||
| + | Brainstorming | ||
| + | --- | ||
| + | #Convolution Matrix in real time > impasto?! | ||
| + | #http://lodev.org/cgtutor/filtering.html | ||
| + | #http://www.imagemagick.org/Usage/convolve/ | ||
| + | |||
| + | ====Paint tools and Clipboard feature==== | ||
| + | All paint tools have the possibility to use the clipboard. | ||
| + | |||
| + | ====Brainstorming===== | ||
| + | [[Image:Clipboard-tool-paint-feature.png]]<br> | ||
| + | |||
| + | The clipboard feature on the paint tools could be used in different ways. Normally is used to create or to use as temporary images to brushes and patterns. | ||
| + | Is possible to use this feature in another ways to improve some painting techniques on GIMP, for example, the impasto. | ||
| + | [[Image:impasto-with-clone-tool+pattern-clipboard-sample-cloud.jpg]]<br> | ||
| + | |||
| + | This method use the clipboard feature to brushes and patterns (texture). The process use many times selecting different parts of canvas, or create swatches to select and copy on clipboard. | ||
| + | To make the process more interesting and easier would be useful a key shortcut to select the image parts without the necessity to change tool. | ||
| + | |||
| + | Process: | ||
| + | # choose the paintbrush; | ||
| + | # without to change the current tool... I select on-the-fly (via key shortcut, e.g, Shift) an area of my canvas, | ||
| + | # When the key is released, the clipboard is loaded. | ||
| + | |||
| + | Buffers and clipboard | ||
| + | Organizing the clipboard via buffers | ||
| + | The Buffer feature could be used to organize the clipboard during the sessions. To use these buffers with paint tools more effectively is necessary to add the possibility to paste the buffer on the clipboard without the necessity to create a pasted layer. | ||
| + | |||
| + | --- | ||
| + | Study better the context of clone+colour, brush+texture, impasto and paintbrush+smudge => it seems all children of the same father :-) | ||
| + | |||
| + | ==References== | ||
| + | [http://gui.gimp.org/index.php/Analysis#the_brush_tools Analysis - Brush Tool] | ||
Revision as of 19:31, 25 April 2016
Contents
Paint tool + Texture (raster)
Patterns/Textures on the GIMP
Which the differences and likeness between pattern and a brush (.gbr and .gih) on GIMP?
- Both are the resources to mark or make stains
- Both are based in raster images
- Pattern is used to emulate textures in different kind of techniques or
- To fill figures with textures
- Brush is used to emulate random textures, of natural properties or not of brushes in the real world.
Well, we can to think the patterns as brush very specific.
Proposal of the feature on GIMP
The tool more near of an ideal Brush with Texture features (similar to Krita or Photoshop) is the Clone Tool. Perhaps this Tool is a good way to build a new Tool.
The Brush + Pattern is basically a dual brush where the pattern is a kind of mask in background. Options need are:
- Colour: Is necessary to use the colour asset on... as a normal brush.
- Texture aspect: Is necessary to have a flag to choose between default and inverted.
- Source: Image and Pattern (texture). Image as source is interesting to control something very similar to impasto or smudge.
- Alignment: Registered and Fixed.
References
How works on Krita
Photoshop
[Bob Chiu Steps Video link
- Create a Pattern > save it on pattern library
- Create a brush
- New document (size x height), for instance with 256x256px;
- New preset brush - on photoshop the brushes birth directly as a preset, interesting (Krita also).
- Select the brush
- Now Brush Options > [1]
- The options is possible to control many aspects:
- Spacing, Hardness Angle, Flip and Size;
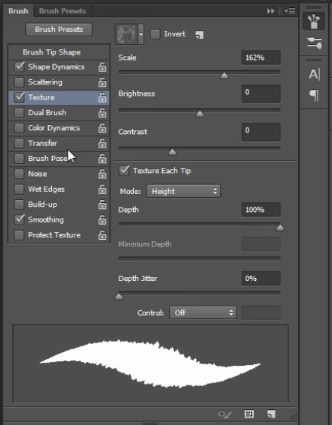
- Enable the Shape Dynamics (basically is a .gbr with gimp paint dynamics); > [2]
- Enable the Texture and is possible to see the library patterns, the options of Texture are: > [3]
- Texture Library (dropdown open manager), Invert (flag), Scale, Brightness, Contrast, Texture each tip (flag), Mode, Depth, Minimum Depth, Deep Jitter, Control (drop down flags).
- Enable Transfer > [4]
- Opacity Jitter or Flow Jitter
- The options is possible to control many aspects:
Paintbrush and Pencil with smudge ability (raster)
Basically, this feature is to have the current Smudge tool + a Paint tool (2) together, in an unique tool. Now, the Smudge tool has only the capability to blend the stains, using a brush. The stains that are previously created.
On GIMP, now, is possible to make this in two steps - first we paint something (Pencil, Paintbrush, Airbrush, etc.) and after, with Smudge tool, we make the blend the stains/strokes.
With MyPaint brushes, is possible to have the smudge on their brushes, but the mark is a basically a circle (dab). In the ideal painting world, is interesting to have the raster brushes with dynamic stains. The .gbr and .gih brushes with paint dynamics)... have the result more richest that a smudge brush on MyPaint. Figure smudge brush with MyPaint Figure smudge brush with GIMP (via 2 steps: make stains with some paint tool and after with smudge tool blend them).
Notes
2. Is necessary to link the smudge with all paint tools... or in only specific tool, for instance, the paintbrush?
Brainstorming ---
- Convolution Matrix in real time > impasto?!
- http://lodev.org/cgtutor/filtering.html
- http://www.imagemagick.org/Usage/convolve/
Paint tools and Clipboard feature
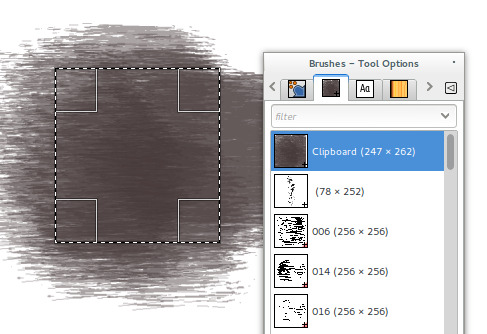
All paint tools have the possibility to use the clipboard.
Brainstorming=
The clipboard feature on the paint tools could be used in different ways. Normally is used to create or to use as temporary images to brushes and patterns.
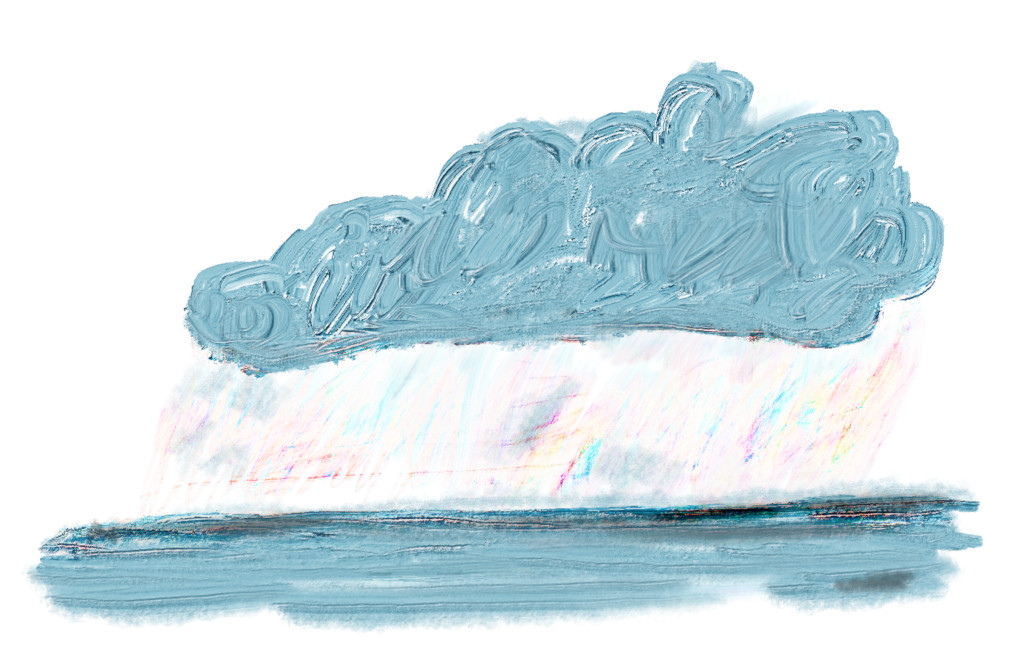
Is possible to use this feature in another ways to improve some painting techniques on GIMP, for example, the impasto.

This method use the clipboard feature to brushes and patterns (texture). The process use many times selecting different parts of canvas, or create swatches to select and copy on clipboard. To make the process more interesting and easier would be useful a key shortcut to select the image parts without the necessity to change tool.
Process:
- choose the paintbrush;
- without to change the current tool... I select on-the-fly (via key shortcut, e.g, Shift) an area of my canvas,
- When the key is released, the clipboard is loaded.
Buffers and clipboard Organizing the clipboard via buffers The Buffer feature could be used to organize the clipboard during the sessions. To use these buffers with paint tools more effectively is necessary to add the possibility to paste the buffer on the clipboard without the necessity to create a pasted layer.
--- Study better the context of clone+colour, brush+texture, impasto and paintbrush+smudge => it seems all children of the same father :-)


